How to use virtual NDI camera source in MS Teams
NDI Version: NDI 6
In this guide, we will walk you through the process of adding your virtual NDI camera source to MS Teams. If you have any issues after following this guide, please contact BZBGEAR Support.
Step one: Find your camera in the NDI Webcam tool

- Open NDI Tools
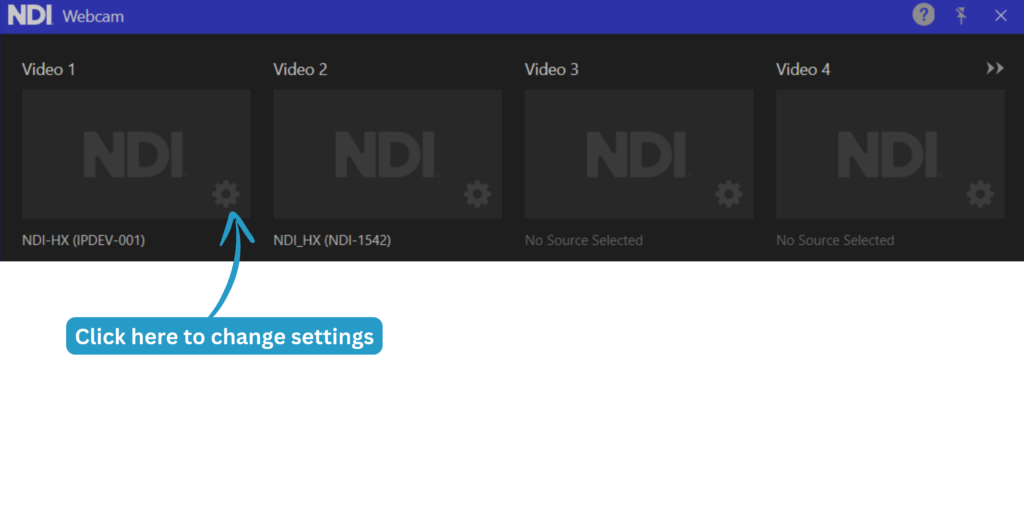
- Click on NDI Webcam
- Click the cogwheel to change your NDI source where you need to (Note: you may not see a preview here. Check that your source is working in your Camera app or something similar to ensure the source is active.)
Step two: Open MS Teams and choose your virtual camera source

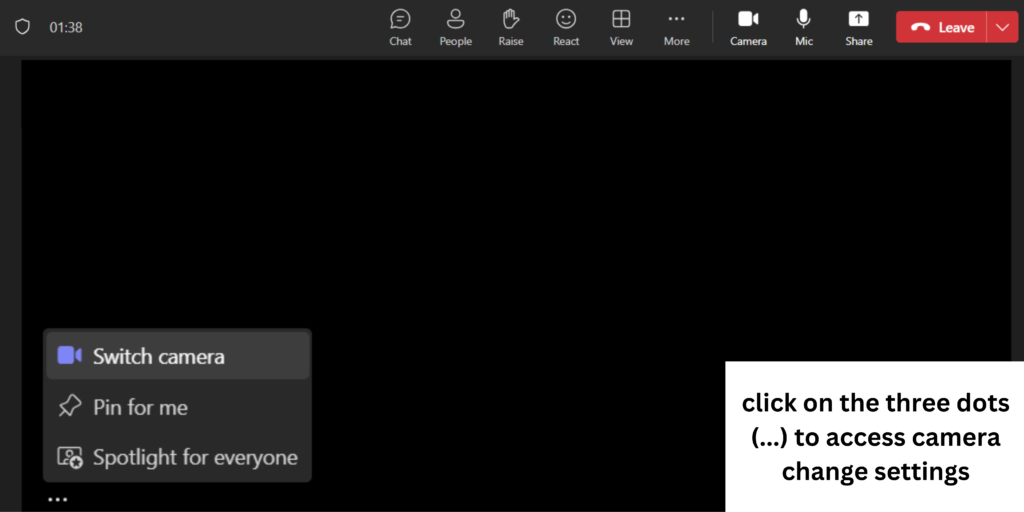
- Locate the camera change settings if you do not see your camera already (Settings can typically be found by clicking on the three dots (...).
- Once your camera feed is up, confirm that the video feed is stable before starting your meeting
Troubleshooting Common Issues
- NDI is network-based, so always double-check that you are receiving a stable network connection
- Go into your camera’s web interface and ensure NDI is enabled
- Make sure that you have the latest version of the NDI tools.
Get insider
updates & offers
Learn more
Get insider updates and offers
Join our vibrant community of BZBGEAR insiders today and unlock a world of exclusive updates, irresistible offers, and invaluable education.
Sales Inquiries
Leave your phone number, and one of our specialists will reach out to you shortly.
Call Us
Technical support
Monday - Friday
8.00 a.m. - 5.00 p.m. (PST)
8.00 a.m. - 5.00 p.m. (PST)
Saturday - Sunday
10.00 a.m. - 3.00 p.m. (PST)
(by appointment only)
10.00 a.m. - 3.00 p.m. (PST)
(by appointment only)
Phone & Email Support
